streetgm
🏅Acemi Tasarımcı🏅
Adım 1

Çeviri:streetgm =)
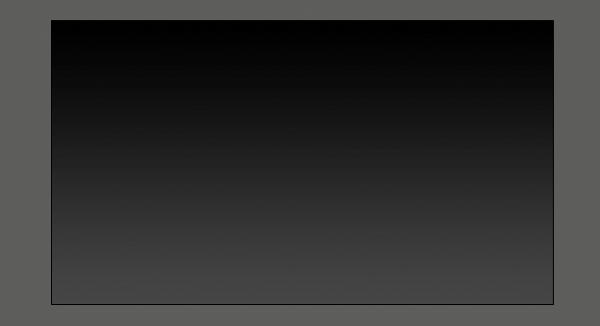
Make a new document that is 2000px by 1200px .
Bu 2000px 1200px tarafından yeni bir belge olun. Then make a new Gradient Adjustment Layer with a linear gradient that goes from a dark gray (#464646) at the bottom to black (#000000) at the top.
Sonra bir koyu gri (# 464646 kimden gidiyor lineer geçişiyle) altındaki siyah (# 000000 için) üstündeki yeni bir Gradient Ayarlama Katmanı olun. This will be our background base.
Bu arka plan temel olacaktır. 
Step 2
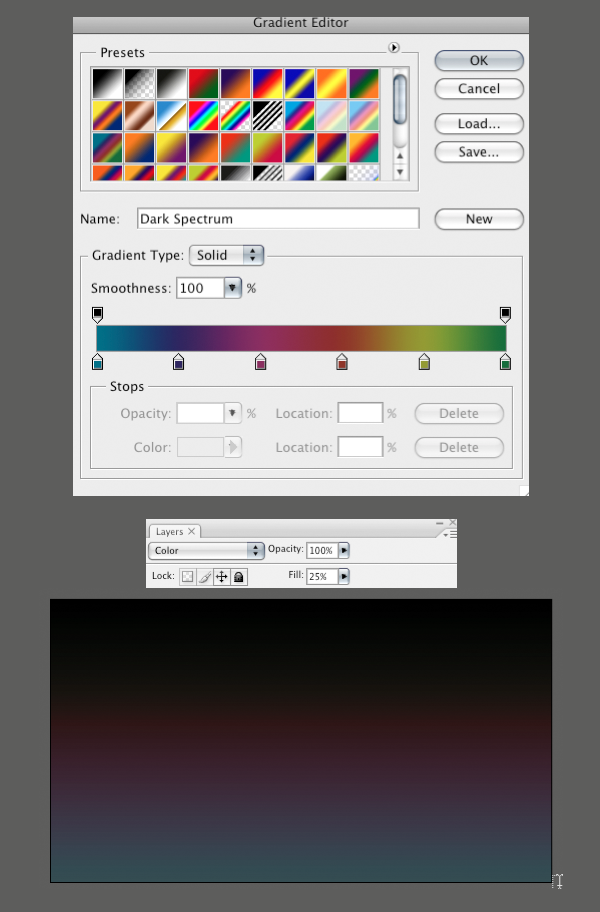
Adım 2 Make another linear Gradient Adjustment Layer above the previous one, and make it a rainbow of colors of your choice.
Önceki yukarıda başka bir doğrusal Gradient Ayarlama Katmanı olun ve seçtiğiniz renklerin bir gökkuşağı olun. There are some colorful presets that you can choose from in the gradient palette, or create your own.
Bazı renkli önayarlarını bu gradient paletinde birini seçebilir veya kendi oluşturmak vardır. Set the layer's Fill down to 25% .
Aşağı% 25 için tabakanın doldurun ayarlayın. Then set the layer's blending mode to Color .
Sonra Renk katmanın harmanlama modunu ayarlayın. Tip: When you set the blending mode to color it makes it so the layer only affects the color of everything below it, while leaving the lightness/darkness alone.
İpucu: Eğer yapar renk için karıştırma modunda bu süre / karanlık yalnız aydınlatın bırakarak bu katmanı sadece aşağıdaki her rengini etkiler. 
Step 3
Adım 3 Finally make another Gradient Adjustment Layer above the previous two.
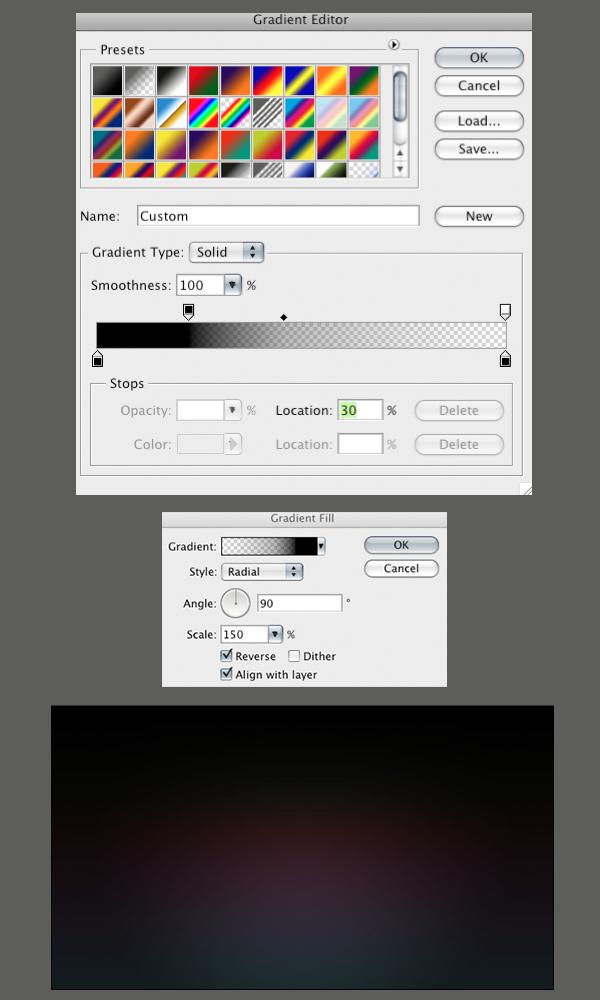
Son olarak önceki iki başka Gradient Ayarlama Katmanı yukarıda olun. This one will be a radial gradient.
Bu bir radyal eğim olacaktır. Set this one up so that the only 2 colors in the gradient are black and then make the transparency go from 100% at one end and 0% at the other end.
Kadar böylece renk geçişi olarak sadece 2 renk ve sonra yapmak şeffaflığını 100% bir sonunda ve% 0 diğer sonuna git siyah bir ayarlayın. If you see that black is covering the center of the image, check the Reverse box .
Eğer siyah, kutuyu Ters kontrol görüntünün merkezinde kapsayan bir bakın. Then make it so the black goes around the edges of the canvas.
Sonra siyah böylece yapmak kanvasın kenarlarına etrafında gider. Set the layer opacity to 65% .
65% için katman donukluk ayarlayın. I moved the transparency handles around a little to get the exact effect that I wanted.
Ben şeffaflık taşınır bir o istedi kesin sonuca ulaşmak için çok az etrafında yönetir. 
Step 4
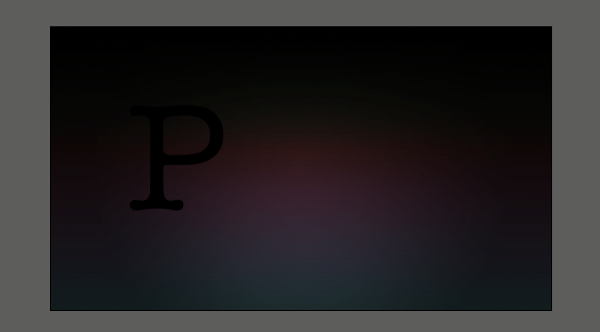
4. Adım Now lets begin with the text treatment. Hit (T) for the type tool , and make a (single click) on the canvas.
Şimdi kısa tedavi ile başlayan sağlar. Türü araç için (T) ve (tek klik) kanvasın üzerine tıklayın. Then type your letter, in my case a P .
Sonra türü mektup, benim durumumda bir P. Then grab the Move tool and (Hit CMD+T) and transform the letter, adjust it until it's the size that you want it. Hit (T) again for the type tool, and if it's not already, make the letter black by clicking the text color box in the property bar.
Sonra ve takım Taşı (Ziyaret CMD + T) yakala ve harfi dönüştürmek, onu ayarlamak kadar boyutu olduğunu de budur. Ve tipi araç için (T) tekrar Hit eğer henüz, tıklayarak harfi siyah make mülkiyet çubuğunda renk kutusunu işaretleyin. Set the letter layer's blending mode to Screen .
Ekran için mektup katmanın karıştırma modunu ayarlayın. The letter will disappear.
Mektup kaybolacaktır. 
Step 5
5. Adım (Double click) to the right of the letter layer's name in the layer palette to bring up the layer styles palette.
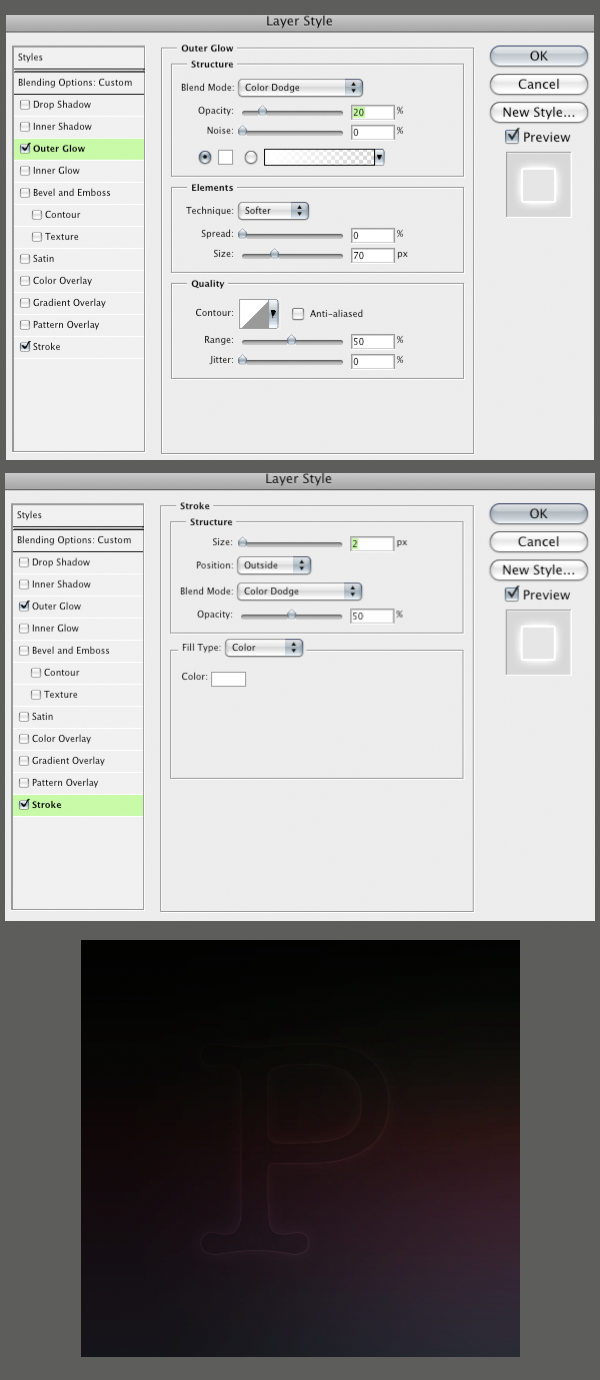
Katman paletinde harfi katmanı adı sağında (çift tıklayın) katman stilleri paleti ekrana getirmek için kullanılır. Put an Outer Glow and a Stroke on the layer with the exact settings that you see below.
Ve aşağıda gördüğünüz tam ayarları olan katmana bir Beyin bir Dış Glow koy. You will see a very faint image of the letter now.
Artık mektup çok soluk görüntü görürsünüz. Let's use this first letter as a starting point for all the text in the image.
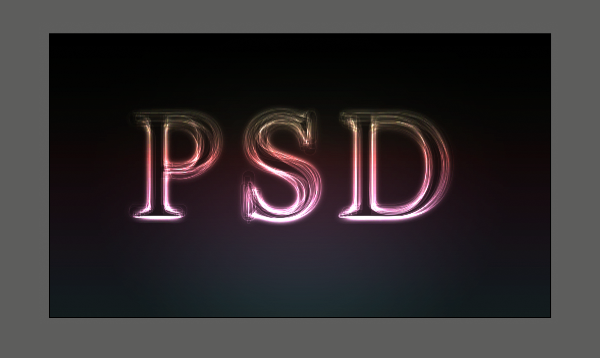
's Resimde tüm metin için bir başlangıç noktası olarak bu ilk harfini kullanalım. Once we layer several different letters on top of each other, our effect will come to life.
Sonra birbirlerinin üzerine biz katmanı farklı harfler, bizim etki hayata gelecek. 
Step 6
Adım 6 Duplicate the letter layer by dragging it down to the New Layer button at the bottom of the layer palette.
New Layer düğmesine katman paletinin altında bir yere sürükleyerek harfi katmanı çoğaltın. Select the type tool (T) and then change the font on the new layer.
Select the type tool (T) ve sonra yeni katman üzerinde yazı tipini değiştirebilir. If the new font doesn't line up how you want to hit (CMD+T) to free transform the new letter.
Eğer yeni yazıtipi hizalayıp değildir nasıl vurmayı (CMD + T) yeni harfi dönüştürmek serbest istiyorum. Make sure that you always line up the baseline of the letters.
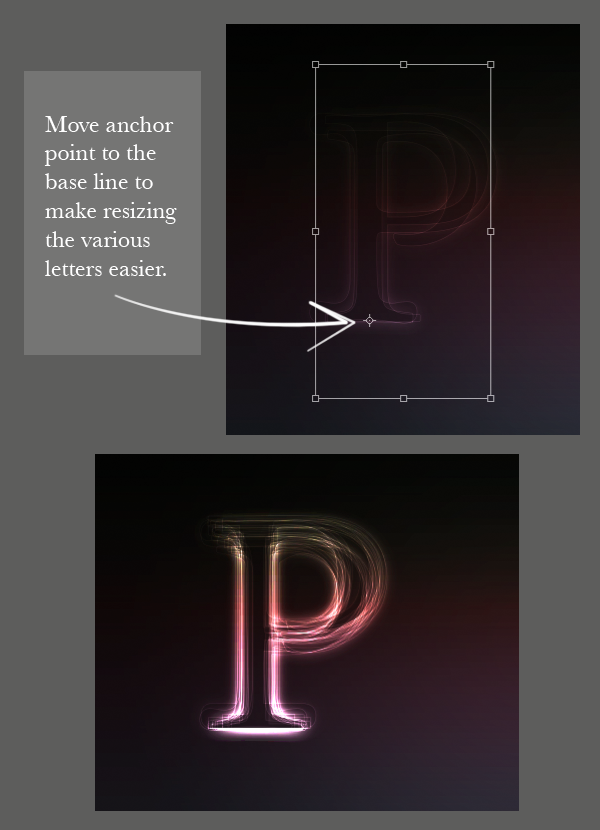
Emin olun her zaman satır mektup, taban kadar. You can move the anchor point to the base line when you are transforming to keep it lined up correctly.
Bu temel çizgi zaman doğru sıralayabiliriz tutmak için dönüşüm için bir dayanak noktası taşıyabilirsiniz. Now do this step 20 times , each time using a different font.
Şimdi 20 kere, her seferinde farklı bir yazı tipi kullanıyorsanız bu adımı yapmak. I chose to use all different fonts that have serifs.
O serifs tüm farklı fontlar kullanmak için seçtim. You can use all fonts that are sans-serif if you like, but I wouldn't mix the two.
Bu sans-serif isterseniz tüm fontlar kullanabilirsiniz ama iki karışımı değildir. 
Step 7
Adım 7 Select all the text layers that you have.
Seçin tüm metin katmanları o var. Then hit (CMD+G) to group them.
Sonra bulunanlar (CMD + G) onların grubuna. With the group selected in the layer palette, hit (V) for the move tool .
Grup katman paletinde seçili (V), hareket halindeyken araç için bulunanlar ile. Then (while holding ALT), click and drag on the letters on the canvas to duplicate them. Drag them to the right where you want the next letter to be.
Sonra () ise, bunları çoğaltmak için tıklayınız ve tuval üzerine harfleri üzerinde sürükleyin ALT tutarak. Sağında burada bir sonraki harf istiyorsanız onları sürükleyin. Now there should be 2 groups of text in the layer palette.
Şimdi katman paletinde metin 2 grup olmalıdır. Turn off all the letter layers in the new group (except the bottom one) by clicking in the little 'eye' icon next to each one.
Bu 'küçük göz in' simgesini her biri yanındaki tıklayarak açın yeni grubu (dışında alt bir) tüm harf katmanları kapatın. Now select the text tool (T) , and highlight the single letter.
Şimdi metin aracını (T), seçin ve tek harfi vurgulayın. Then change it to the next letter that you want, in my case an S .
Daha sonra istediğiniz bir sonraki harf için, benim durumumda bir S değiştirmek. Finally, turn the S layer off .
Son olarak, S katmanı kapatın. Then turn on the next one and do the same.
Sonraki açmak ve aynı yapmak. Repeat this until all the letters in your new group are changed.
Yeni grubundaki tüm harfleri kadar bunu tekrarlayın değiştirilir. Turn all the layers back on.
Aç tüm katmanları geri. Repeat this step for each new letter you need.
Ihtiyacınız olan her harf için bu adımı yineleyin. 
Step 8
Adım 8 Select the elliptical marquee tool and make a very thin ellipse at the base of your letters.
Seçin eliptik büyük çadır aracı ve çok ince elips yapmak için harf ve üssünde. Then Feather the selection about 20px .
Daha sonra Feather seçimi hakkında 20px. Enter quickmask mode (Q) .
Quickmask modu (S) girin. Then go to Filter>Blur>Motion Blur .
Sonra Filtre gitmek> Blur> Motion Blur. Make the angle 0 and the length 700px and hit OK .
Ve uzunluğu 700px Açı 0 yapın ve OK tuşuna basın. This gives us a nice fade out to the left and right sides.
Bu bize güzel bir sol ve sağ taraf için karartmak verir. Then exit quickmask mode (Q) .
Sonra quickmask modu (S) çıkın. Now make a curves adjustment layer above the gradients, but below the letter groups.
Şimdi bu geçişlerini eğrileri üzerinde bir ayarlama katmanı, ancak harf grupları aşağıda. Then apply a curve that looks like the one below.
Sonra bir eğri geçerlidir aşağıdaki gibi görünüyor. This just gives our letters something to sit on.
Bu sadece oturmak için harf şey verir. 
Step 9
Adım 9 Make a new document that is 300px by 300px . Double click on the background layer to make it an active layer. (Double click) to the right of the layer name to open the layer styles palette.
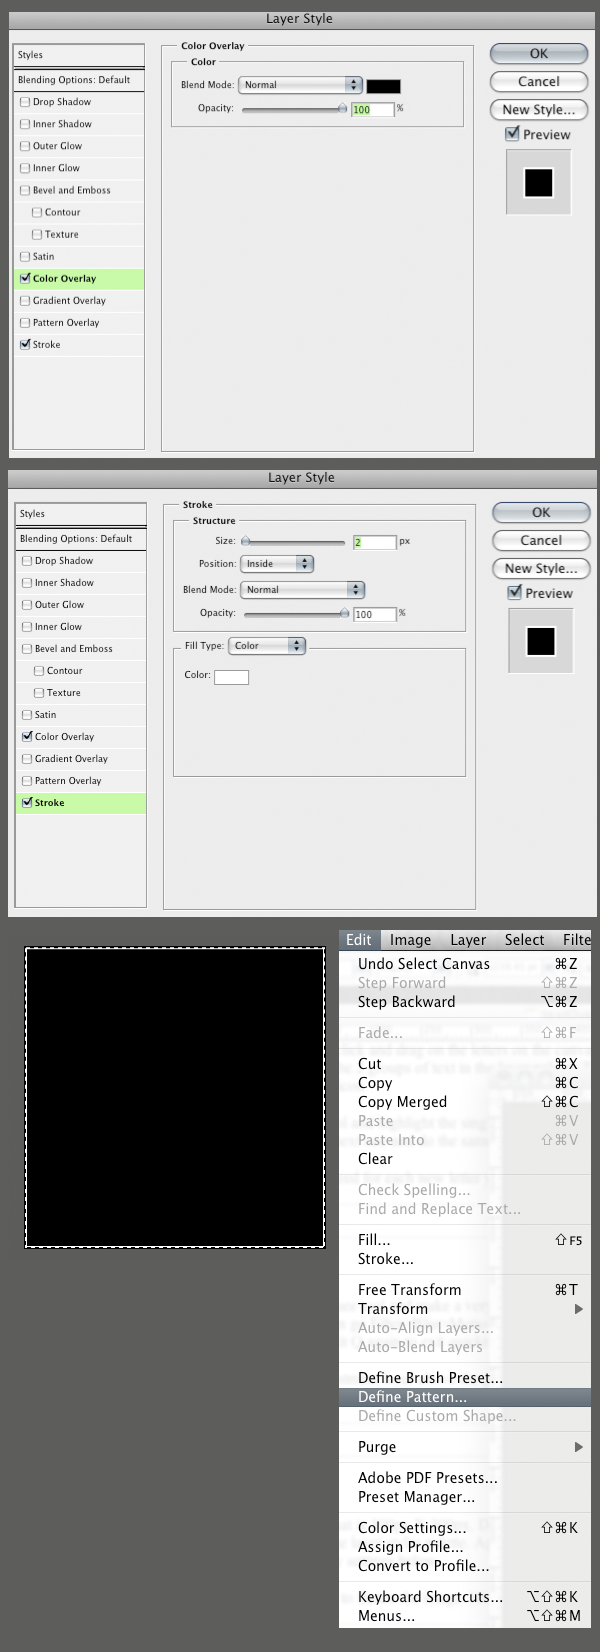
Bu 300px 300px tarafından yeni bir belge olun. Arka plan katmanını üzerinde etkin bir katman seçin. Katman adının doğru katman stilleri paleti açmak için (çift tıklayın) çift tıklayın. Apply a color overlay to make the layer black.
Bir renk yerleşim Uygula'yı katman siyah yapın. Then add an inner stroke that is white to make a border.
Sonra bir sınır yapmak için beyaz bir iç vuruş ekleyin. You can see my settings below.
Aşağıda ayarlarım görebilirsiniz. Go to Layer>Flatten Image to flatten the image. Hit CMD+A to select all and then go Edit>Define Pattern .
Katmanı git> Flatten Image resmi düzleştirin için. CMD Hit + A tüm seçin ve sonra Düzenle> tanımlayın Modeli gidin. 
Step 10
Adım 10 Go back to your other document.
Geri diğer belge gidin. Make a new blank layer just above your curves layer by hitting the New Layer button at the bottom of the layer palette.
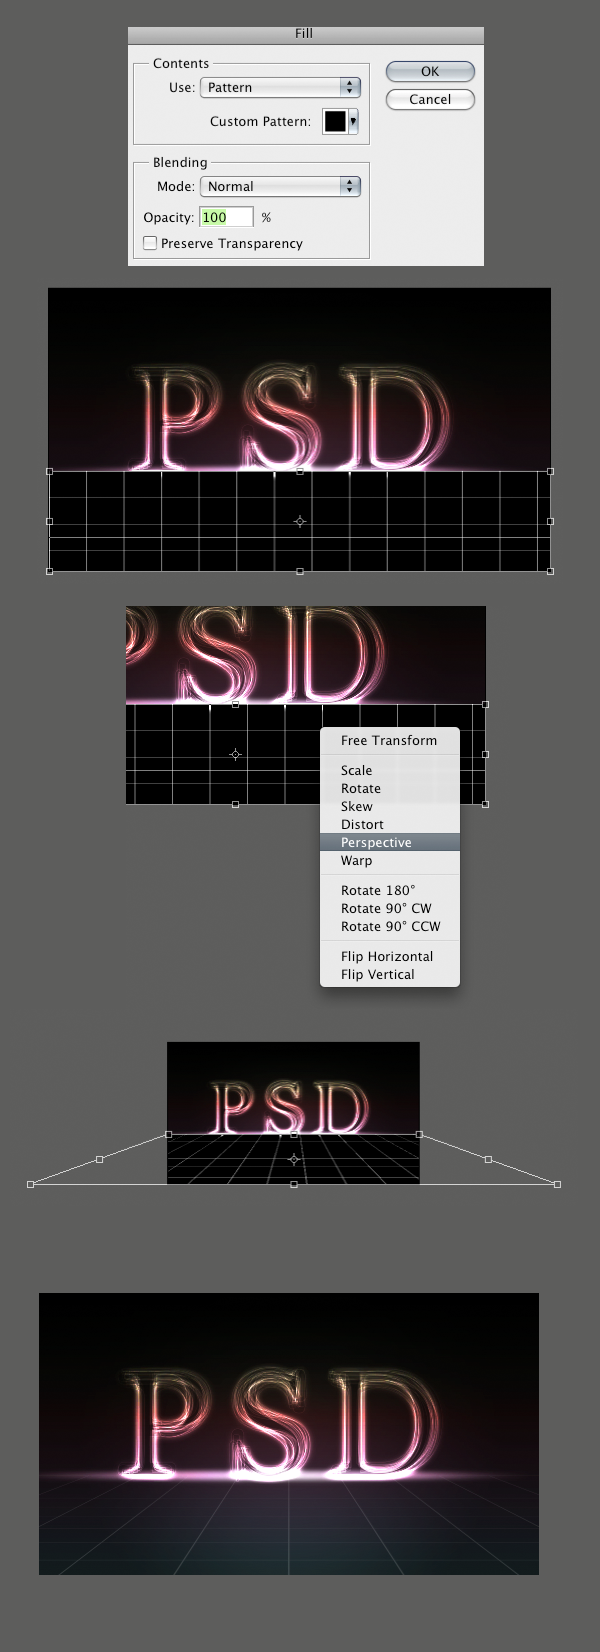
Katman paletinin altındaki New Layer düğmesini isabet ederek eğrileri katman üstünde yeni bir boş katman olun. Not go to Edit>Fill and select Pattern for the Contents .
Değil Düzenle gitmek> doldurun ve İçerik seçin Desen. Then select your black box that should be at the end of the list, and hit OK .
Sonra, bu listenin en sonunda olması gerekir sizin siyah kutusunu seçin ve Tamam'a basın. Now Hit (CMD+T) to transform the layer so that it fits in the foreground space.
Bu ön alan sığan Şimdi (CMD + T) bu katmanı çevirmek için. Then (right/control+click) anywhere in the transform box and select perspective . Drag the bottom right handle way out so you get a nice perspective on the pattern layer.
Daha sonra (sağ / kontrol + tıklama) herhangi bir kutu seçin ve perspektif dönüşüm içinde. Doğru dışarı böylece modeli katman güzel bir bakış açısı elde şekilde idare altına sürükleyin. Set the layer's blending mode to screen and the opacity to 15% .
Ekrana ve% 15 matlık katmanın harmanlama modunu ayarlayın. 
Step 11
Adım 11 There is one last step to add a finishing touch.
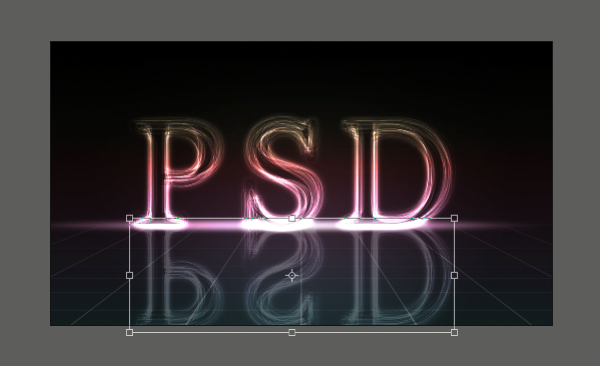
Bir bitiş dokunuş eklemek için son bir adım. Select the type layers and duplicate them by dragging them down to the New Layer button .
Select the type katmanları ve çift New Layer düğmesini aşağı sürükleyerek. With the new groups selected hit (CMD+T) then (right/control+click) in the transform box and select Flip Vertical .
Ile yeni gruplar (CMD + T) sonra da (sağ / kontrol + tıklama) kutuyu dönüşümü ve Flip Dikey seçin isabet seçildi. Move them down so they look like a reflection.
Aşağı şekilde bir yansıması gibi onları hareket ettirin. With all the reflection groups selected hit (CMD+G) to put them into another group.
Tüm yansıma grupları bulunanlar seçilen (CMD + G) başka bir grup içine koymak. Set that group's opacity to 25% .
Dizi 25% için grubun matlık. Add a mask to the group by clicking on the Add Layer Mask button at the bottom of the layer palette.
Grup için katman paletinin altında Layer Mask düğmesi ekleyin tıklayarak bir maske ekleyin. With the mask selected hit (G) for the gradient tool and apply a linear gradient from black to white, so the reflection fades out as it goes down to the edge of the image.
Ile maske (G) gradient araç için isabet seçtim ve siyah beyaz bir doğrusal eğim geçerlidir, bu nedenle yansıma "fades çıkışı olarak aşağı resmin kenarına gider. 
Çeviri:streetgm =)